
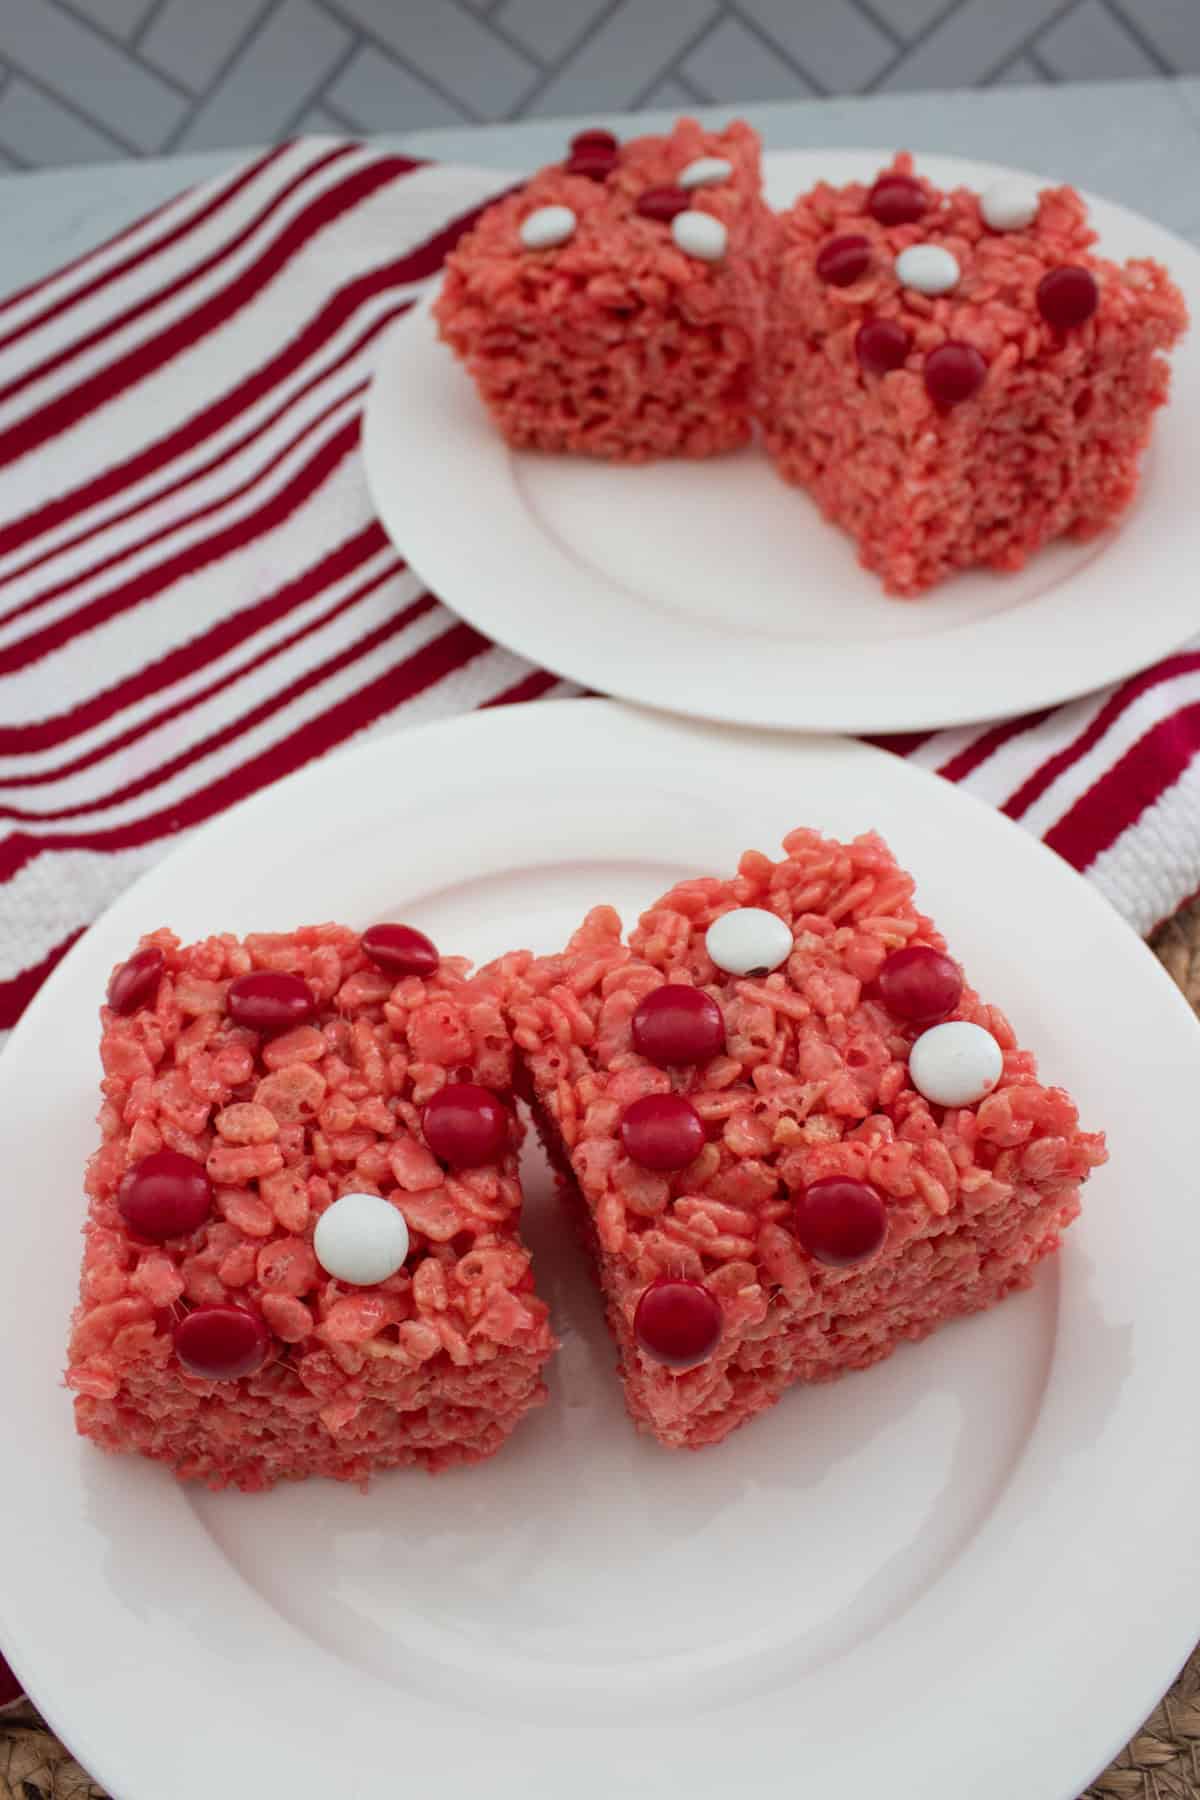
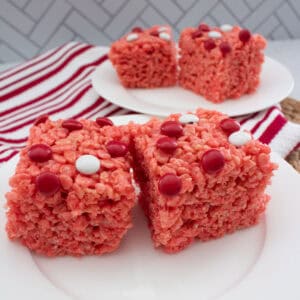
This Valentine’s Rice Krispie Treat recipe is a no bake dessert that checks all the boxes. It’s made in one pot, tinted pink, and finished with crunchy red and white chocolate candies on top. Think of it like the classic childhood treat, dressed up in a heart-day outfit.
You can also choose your vibe for this Valentine dessert: an 8x8 or 9x9 pan for tall, bakery-style squares, or a 9x13 pan for thinner, classic party bars. And if you don’t have the exact candies, no stress, you can swap toppings with whatever you’ve got.
Let's Get Started! Here's What You'll Need:

Ingredients
- Rice Krispie cereal- brand isn't critical here, but freshness is. You'll want a newly or recently opened box.
- Mini marshmallows- they don't have to be mini, but smaller ones melt faster so I always reach for the mini when making cereal treats. Again, freshness matters, stale marshmallows make for hard treats.
- Butter- We're using a whole stick of salted butter.
- Vanilla extract- A little bit makes such a flavor difference.
- Red food coloring- I'm using liquid, gel will give you a brighter color with less. Or, if you can find pink marshmallows at your store you can use that instead.
- Red and white chocolate candies or whatever other toppings you like: Valentine's Day sprinkles, white chocolate chips, or a red or white candy melt drizzle all fit.
Equipment
- Pot or saucepan- Large enough for melting the butter and marshmallow mixture.
- Spatula- I reach for silicone here, wooden will work but the mixture sticks to it more.
- Measuring cups- for the cereal.
- Mixing bowl- to combine the Rice Krispie cereal and marshmallow mixture in.
- Pan (8x8, 9x9, or 9x13)- the larger the pan, the shorter the treats. For tall bakery style squares go with a square pan, while the 9x13 will make thinner bars more like the school party version most of us grew up with.
- Parchment paper or nonstick spray- You can either line your pan with a parchment sling like I did in these Christmas treats, or generously grease the pan with either butter or cooking spray.
How To Make Valentine’s Rice Krispie Treats
Step 1: Prep your pan and cereal
Line with parchment (leave an overhang so you can lift them out), or grease well with butter or nonstick spray. The wrapper from your stick of butter is great for this. Also measure out your Rice Krispie cereal into the mixing bowl so that it's ready to go when the hot marshmallows are.

Step 2: Make the marshmallow mixture
Melt 8 tablespoons (1 stick) butter in a large pot over low heat. As soon as the butter is fully liquid, add in the marshmallows. Keep the heat low until the marshmallows are mostly melted but the mixture is slightly lumpy, then add in the red food coloring and stir until the color is even. Once the color is even and a shade you're happy with, turn off the heat and add the vanilla.

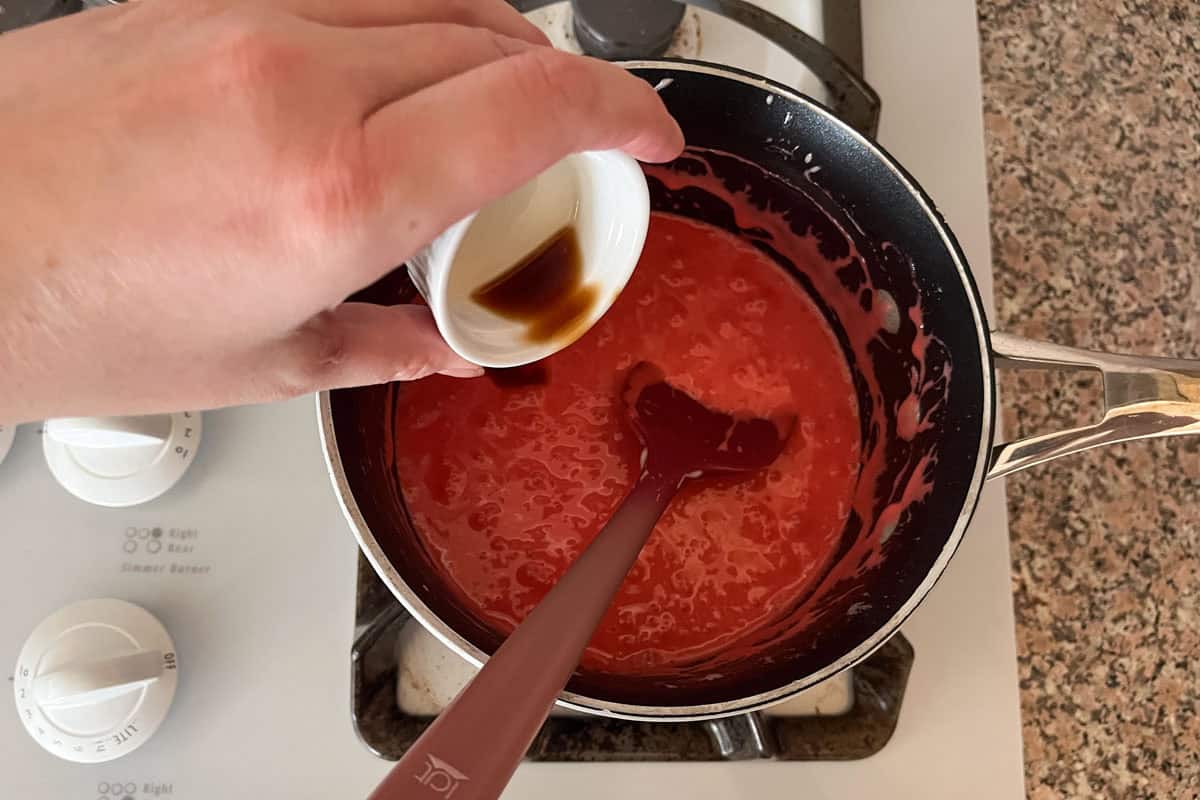
Tip: It's okay if there are a few small lumps left when you turn off the heat- the residual heat will melt them while you stir in the vanilla.
Step 3: Pour over cereal
Slowly drizzle the marshmallow mixture over the Rice Krispie cereal until coated. Try not to crush the cereal as you mix. If your spatula likes to stick to the mixture you can grease it with some butter or cooking spray.

Step 4: Form and Decorate
Spoon the cereal mixture into your pan and smooth gently into an even layer. Too much force will compress the treats, making them dense and giving a tougher texture- use just enough to even them out. Sprinkle red and white candies or other toppings on and gently press larger candies in so they stick.

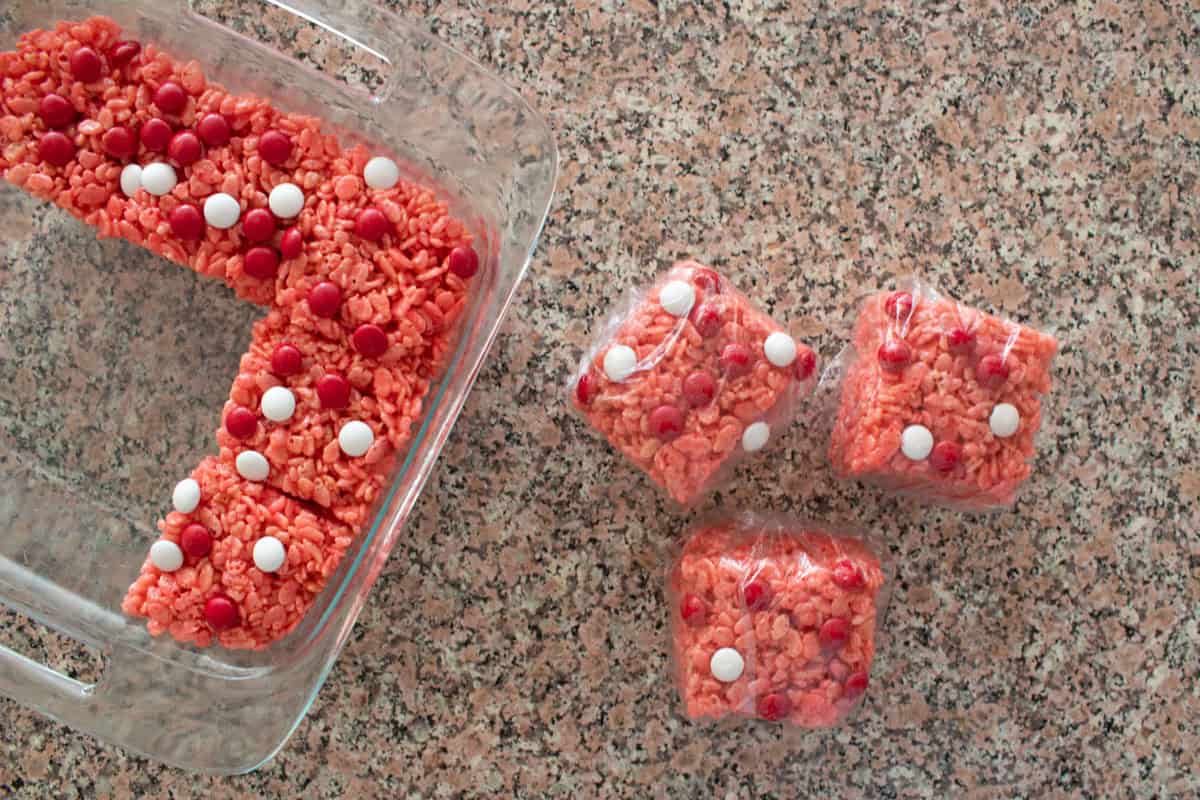
Step 5: Cool, cut, and (optionally) wrap
Let the treats cool until completley set for 30 minutes to an hour, and then slice into your desired portions. Like the spatula, buttering or preparing the knife with cooking spray will help keep it from sticking, though once the treats have cooled you may not need to use either.
If giving them out or packing in lunch boxes, you can wrap them in plastic wrap for individual valentine treats. I usually put my Christmas Rice Krispie Treats in a cookie box with some other treats, but for Valentine's I like to wrap them individually.
Recipe Success Tips
- Use low heat and melt the marshmallows just until smooth and gooey, then remove the pot from the burner right away.
- If using the microwave, melt butter and marshmallows in 30-second increments and stir between each round so the marshmallows do not overheat.
- Use fresh marshmallows, since older ones can be dry and make the treats firm.
- Press gently into the pan, just enough to level the top, because packing them down makes them dense and tough.
- Let the treats cool completely before cutting so the edges stay clean and neat.
- For the cleanest slices, lift the slab out with a parchment sling, spray your knife lightly with cooking spray, and wipe the blade between cuts.
- Cut by pressing straight down (not sawing), especially if your treats are thick.
Storage Directions
- Storage: The DIY Christmas Rice Krispie treats keep covered in an airtight container at room temperature for up to 3 days. They also can be refrigerated for up to 5 days.
- Freezing: Store the treats in a freezer-safe bag in the freezer for up to 3 months. Defrost them at room temperature for 30-60 minutes or until thawed.

Recipe Variations
- For a dipped finish, coat squares in white chocolate, almond bark, or candy coating after cutting.
- Sprinkle the top with Valentine’s Day sprinkles for a quick, festive finish.
- Have a heart shaped cookie cutter? Use it to make rice krispie hearts! Keep in mind to you'll want to make your treats shorter than the cookie cutter.
- Add red and white chocolate candies for a classic Valentine look.
- Drizzle melted white chocolate over the top, then add sprinkles before it sets for a bakery-style look.
- Cut into heart shapes with a cookie cutter once fully cooled (expect a few extra crumbs).
- Pipe a simple “XO” with icing for an easy decorated version.
More No-Bake Sweet Treats
Enjoy!
These rice krispie valentine treats keep it simple with just a few ingredients, and you can dress them up or down with different candies or toppings to make them perfect for any party table. I hope you love them as much as we do!
📖 Recipe
Valentine's Rice Krispie Treats
Equipment
- Pan 8x8, 9x9, or 9x13 depending on treat thickness preference
- mixing bowl heat safe
- Medium or Large saucepan
- spatula
- measuring cups
- Parchment Paper optional, can use nonstick spray
Ingredients
- 8 tablespoon butter salted
- 10 oz marshmallows mini melt fastest
- 6 cups rice krispie cereal
- 12 drops red food coloring to preference
- ½ teaspoon vanilla extract
- ¼ cup chocolate candies or other toppings of choice
Instructions
- Grease your pan or line it with parchment paper with an overhang to lift it out after. Place rice krispie cereal in the mixing bowl.6 cups rice krispie cereal
- Melt the butter and marshmallows in the saucepan over low heat. Once marshmallows are mostly melted but slightly lumpy, add the food coloring and stir until the color is even. Turn off heat and stir in vanilla.8 tablespoon butter, 10 oz marshmallows, 12 drops red food coloring, ½ teaspoon vanilla extract
- Drizzle the marshmallow mixture over the rice krispie cereal while slowly stirring to combine. Be careful not to crush the cereal when mixing, and stop once the marshmallow mixture is fully incorporated.
- Transfer the cereal mixture into your prepared pan and smooth gently into an even layer, being careful not to press down with much force. Top with chocolate candies, or other decorations of your choice (ie sprinkles, frosting, candy melts) and let set 30-60 minutes.¼ cup chocolate candies
- Slice into portions, as few as 3x3 in a square pan for large bakery style treats, as many as 6x6 in a 9x13 pan for bite sized treats.
Notes
- Use low heat and melt the marshmallows just until smooth and gooey, then remove the pot from the burner right away.
- If using the microwave, melt butter and marshmallows in 30-second increments and stir between each round so the marshmallows do not overheat.
- Use fresh marshmallows, since older ones can be dry and make the treats firm.
- Press gently into the pan, just enough to level the top, because packing them down makes them dense and tough.
- Let the treats cool completely before cutting so the edges stay clean and neat.
- For the cleanest slices, lift the slab out with a parchment sling, spray your knife lightly with cooking spray, and wipe the blade between cuts.
- Cut by pressing straight down (not sawing), especially if your treats are thick.
- Storage: The DIY Christmas Rice Krispie treats keep covered in an airtight container at room temperature for up to 3 days. They also can be refrigerated for up to 5 days.
- Freezing: Store the treats in a freezer-safe bag in the freezer for up to 3 months. Defrost them at room temperature for 30-60 minutes or until thawed.
- For a dipped finish, coat squares in white chocolate, almond bark, or candy coating after cutting.
- Sprinkle the top with Valentine’s Day sprinkles for a quick, festive finish.
- Have a heart shaped cookie cutter? Use it to make rice krispie hearts! Keep in mind to you'll want to make your treats shorter than the cookie cutter.
- Add red and white chocolate candies for a classic Valentine look.
- Drizzle melted white chocolate over the top, then add sprinkles before it sets for a bakery-style look.
- Cut into heart shapes with a cookie cutter once fully cooled (expect a few extra crumbs).
- Pipe a simple “XO” with icing for an easy decorated version.
Nutrition
Nutrition information is provided as a courtesy and is an estimate. It is recommended to use your preferred calculator with the actual ingredients you use for optimal accuracy.


Leave a Reply