
If the mess behind your oven door makes you cringe every time you open it, but the self-clean cycle makes you more nervous than the mess, you are not alone. My own older oven has a self-clean setting that I used once, hated, and then ignored for years. It got cleaner, sure, but the heat, the smell, and the all-day commitment gave me the heebie-jeebies.
In this guide, you’ll learn how to steam clean using simple tools you probably already have at home. No harsh chemical cleaners, no extreme temperatures, and no special built-in steam cycle required. Just water, time, and a bit of elbow grease.
Why Steam Clean Beats the Self-Cleaning Cycle
My double oven is original to the house, from the 90s, and the top oven has seen some things. Food residue, splatters, cheesy casseroles that bubbled over, you name it. The bottom oven has been rarely used, so still looks almost new, while the top oven looked rough.
At one point, I tried the self-clean cycle on that top oven. It did get cleaner, but I felt uncomfy the whole time. The temperature was sky-high, the kitchen was hot for hours, and I decided I never wanted to do that again if I could help it. That was the last time I used self-clean.
Later on, I learned that my nerves were not just in my head. Appliance expert RenDuHOfficial has talked about why the self-clean option can be hard on ovens. That helped confirm my gut feeling and pushed me toward a gentler method.
Steam cleaning is a nice middle ground. You still get a big improvement, but you use normal baking temperatures and basic household remedies. You can even repeat the process as many times as you need, without worrying that you are cooking the electronics.
Unlike the self-clean cycle, steam cleaning uses regular baking temperatures and a pan of distilled water. You let it do what it already does well: heat up, create steam, and soften burnt-on food so it wipes off easier.
This steam clean option is perfect if:
- Your oven does not have a built-in steam cycle
- You feel uneasy about running the self-clean option
- You want a gentler, repeatable way for cleaning the oven
If your oven is newer and has its own steam-clean setting, check your manual first. The built-in program may have specific instructions that differ from this basic method.
For most older or standard ovens, here is why this approach works well:
- Less hands-on time than scrubbing a totally dry, crusty oven.
- No crazy high temps, just 450°F, which is similar to roasting.
- You can repeat the steam part as often as you like, since it's no harsher on your oven than making dinner.
- No harsh or expensive chemical oven cleaners like cleaning foam- just distilled water and baking soda.
Think of it as giving your oven a long, steamy soak before you scrub.
Let's Get Started! Here's What You'll Need:
The beauty of this method is that you do not need special cleaners or tools. You likely have everything you need, with one important exception.
The biggest thing you need to buy is distilled water.
Distilled water is key because it keeps you from trading one mess for another. Unlike regular tap, it lacks minerals like calcium and magnesium. Those minerals can leave white, chalky streaks and spots, also known as scale, when boiled and dried. The distilled variety has those minerals removed, so it dries without that residue. I used to work in water treatment and deal professionally with calcium, magnesium, and scale, so I have spent more time than most people dealing with it.
All that to say, distilled water in this process is not just a nice extra, it's important to not use tap water. You can usually find it sold in a gallon jug at grocery stores, pharmacies, or big-box stores. I grabbed mine at CVS.
Must-Have Basics
Here is what you will want to have ready before you start:
- Distilled water
About 2 cups per steam cycle. This prevents mineral spots and deposits from forming in your freshly cleaned interior. - Container
Any oven-safe dish works well, as long as it's large enough that the liquid sits under halfway full, since it will come to a rolling boil and you do not want it to boil over. - Baking soda
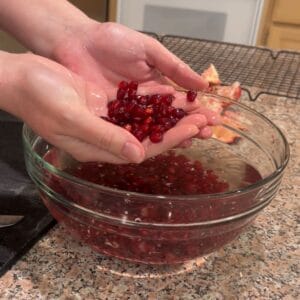
You will mix this with a small amount of liquid to make a thick paste, more like glue than a liquid. The paste helps tackle stubborn spots, especially on the window. - Sponge and microfiber cloth
Old cotton rags work great for wiping out the bulky stuff, and a non-scratch sponge gives you a little extra oompfh. - Vinegar
You will use a small amount at the end, to help wipe away leftover paste and any mineral traces from rinsing your rag and sponge. Do not use it at the same time as the baking soda paste, since they cancel each other out.
Step-by-Step: Prep Your Dirty Oven
Before you bring in the steam, you want to give it a quick tidy so the heat can focus on the burnt-on food, not loose crumbs.
It was very dirty when I did this, and the prep step still only took a few minutes. Think of it as knocking off the big stuff so the steam can work more efficiently.
Remove Racks and Wipe Loose Grime
Start by taking out all the oven racks. Set them aside for now. You can clean them separately later or during the steam cycle downtime.
Grab a damp rag or sponge and start by wiping out the big chunks first. Any burnt pieces of food, flakes, or loose crispies should go. This is not a deep clean yet, just a quick sweep.
If it has a bottom panel that lifts slightly, you can gently raise it a bit to reach underneath the “feet.” Do not force it. Some models lift a little, others not at all. If yours feels stuck, let it be.
Set Up for Steaming
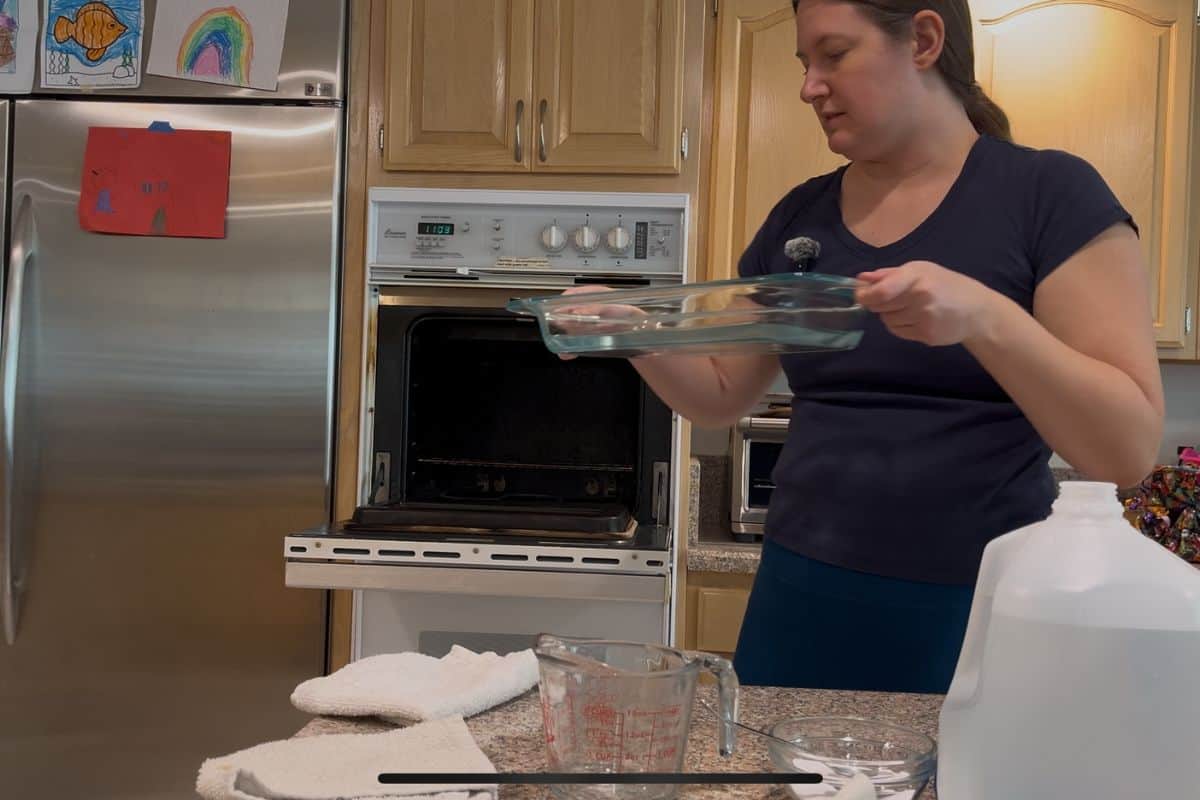
Now place one of your racks back in on the lowest position.
Pour about 2 cups of distilled water into your large baking dish. Make sure the level is well below halfway in the pan. You want room for it to boil without spilling over.
Set the pan on that bottom rack. Take one last look at the “before” situation if you want a mental before-and-after, then close the door.
You are ready to steam.
Run the Steam Cycle Like a Pro
The actual “steam clean” is simple. It heats up, softening all that stuck-on food residue so it wipes off with far less effort.
Most of your time here is just waiting while it does its thing.
Heat It Up
Preheat the oven to 450°F.
On many ovens, a little light will turn off once it reaches the set temperature. Once your oven reaches 450°F, start your timer and let it run for another 15 to 20 minutes.
During that time, the hot water in your pan will act as a steam cleaner. The inside will fill with steam to loosen grime on the walls, floor, and door.
Leave the door closed the entire time.
Cool Down Safely
After that 15 to 20 minutes of active steaming, turn it off, but keep the door closed. This is when the moisture continues to work.
Let it sit closed for about 1 hour. You want it to retain some heat so the moisture can keep softening the residue, but you also need it to cool down enough that you can safely reach in and scrub.
All in, you are looking at roughly 1.5 hours from start to the time you can begin scrubbing, depending on preheat time.
When you open it after that hour, the outside should feel warm, not scorching. Use a dry towel, mitt, or rag to carefully remove the pan. If any liquid is left, try not to spill it.
If your oven was extremely dirty, you can run this process a second time before scrubbing, to reduce how much elbow grease you need.
Once it is warm but safe to touch, it is time to scrub.
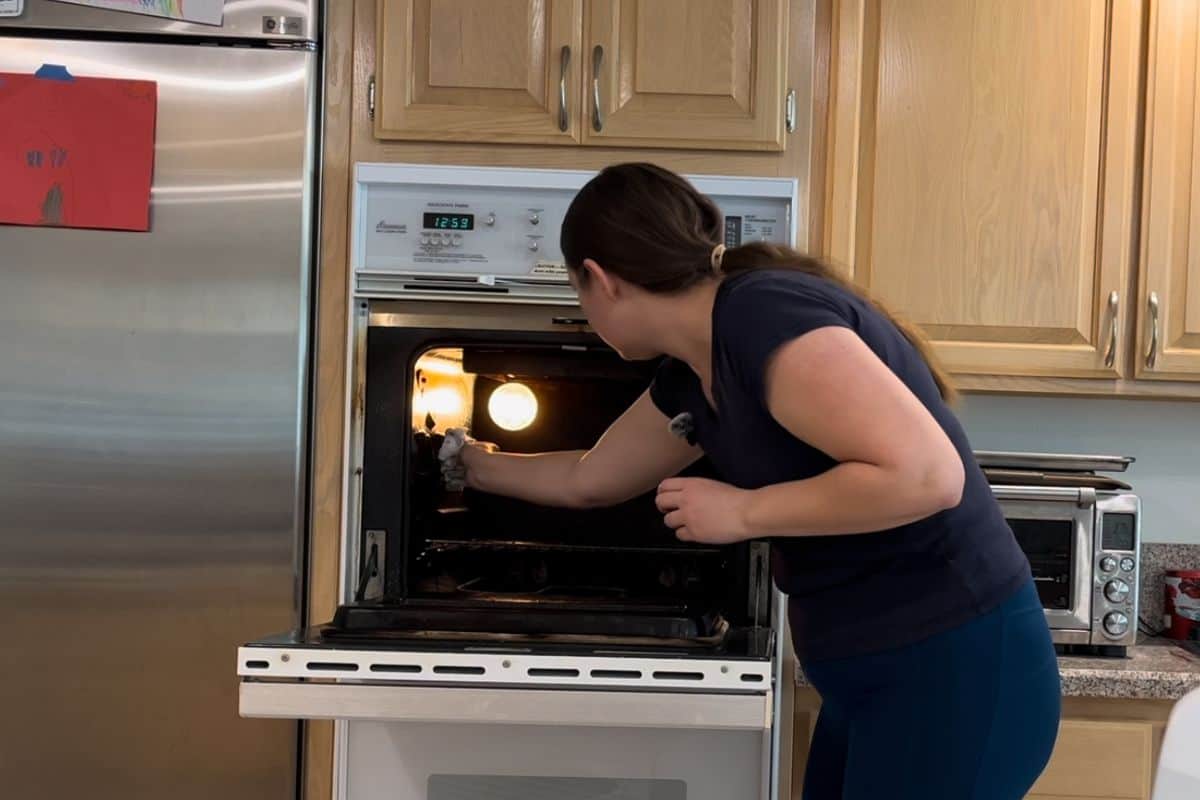
Scrub with Elbow Grease (It Is Easier After Steam)
Steam does the heavy lifting, but it will not magically return the oven to pristine condition. You will still need to scrub, especially if it has been “a minute” since the last clean. The good news is that after steaming, the grime is soft and much easier to remove.
Make and Apply Baking Soda Paste
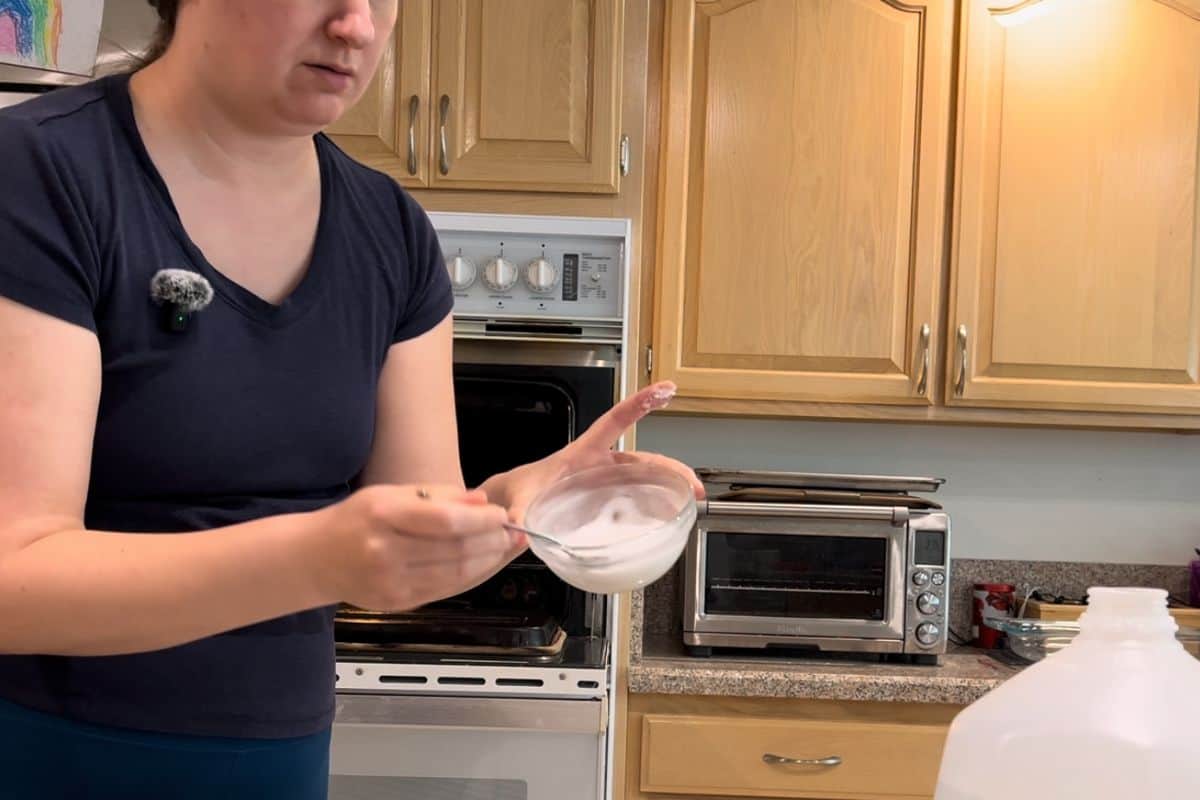
In a small bowl or container, start mixing baking soda with just a little water. Stir until it becomes thick and spreadable, with the consistency of school glue that has some lumps.
If you add too much water at first, do not worry. Just sprinkle in more baking soda and stir again. You want it clumpy and dense, not runny.
Once your paste is ready:
- Mix the paste until it is thick and holds its shape on your spoon.
- Spread it on the worst spots, especially the window, the floor, and any areas with visible grease or dark buildup.
- Rub lightly with a sponge or rag, letting the grit do the work.
You can let the paste sit for a few minutes on stubborn stains, then scrub again.
Key Scrubbing Spots and Cautions
Most people find the window to be the most satisfying spot to clean, since you actually want to see your food while it cooks. That was true for me. Once I could see through the glass again, the whole interior felt cleaner.
Good places to focus your paste and scrubbing:
- The window inside the door
- The bottom where things spill and burn
- The side walls with splatters and streaks
A few important cautions while you clean:
- Be gentle on the gasket, the soft seal around the oven door. You do not want to rub or tear it.
- Avoid getting gritty paste into the hinges, since it can gum them up.
- Use elbow grease, but do not lean your body weight on the open door. It can be tempting to apply more pressure without thinking about it, but the door isn't made for that.
- Stay clear of any exposed temperature probe or sensor. Wipe around it, not over it.
- Try not to stare straight at the interior light while you clean around it. It is surprisingly bright, and not good for your eyes.
If you notice tiny burnt specks trapped between two panes of glass in the door, those often cannot be cleaned from the inside. They are sealed in, and no amount of rubbing will reach them. That is normal.
If you are not happy with how clean the sides or ceiling are after one round, remember that you can always run another steam cycle before the next big clean.
Finish with a Vinegar Wipe Down
Once you are satisfied with your baking soda efforts, wipe out as much of the paste as you can with a damp rag. Rinse and wring the rag as needed. This might leave a bit of white residue or streaks, especially if your tap water is hard.
This is where vinegar comes in.
Lightly dampen a microfiber cloth with a bit of vinegar and wipe the interior surfaces again. The vinegar helps clear away leftover baking soda and any fresh hard water spots from rinsing your rag.
Vinegar is food-safe, so a tiny bit left behind is not a concern. You are just using enough to pick up residue and avoid chalky white lines as everything air dries.
You will probably drop some dried bits of paste or grime onto the floor in front while you clean. That is fine. A quick sweep or vacuum afterward will take care of it.
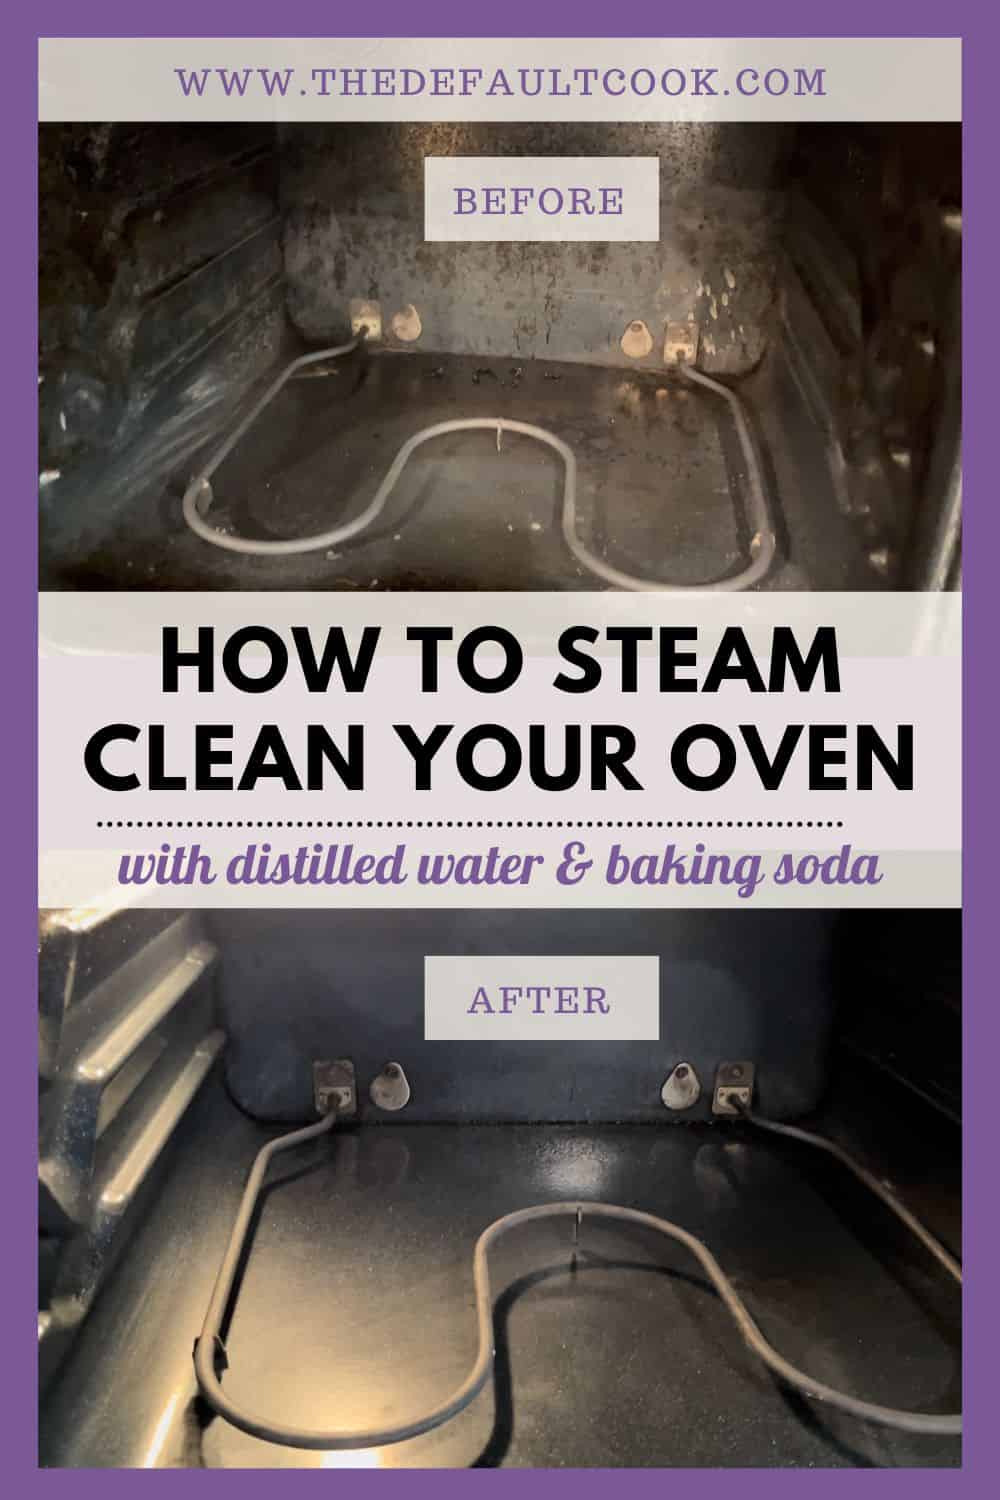
Before and After Results and Real Talk


After one cycle and a solid round of scrubbing, it looked completely different. Not perfect, but genuinely usable and pleasant again.
There was still some burnt-on food in the highest corners, and some speckling between the door glass panes, but the main cooking area and the window looked almost like a different appliance. Compared to the rarely used lower unit, the cleaned upper unit was still older, but no longer embarrassing.
And the best part was that it did not take the whole day or generate excess heat.
See the Transformation

The window was the most improved to me functionally. After, I could see the racks through the glass again. I could see my hand clearly on the other side. I love that.
On the bottom and walls, there was far less grime. The spots I had worked on felt smooth to the touch, almost squeaky clean. There were still a few stubborn patches on the sides and the ceiling, but far less than before.
If I wanted a truly deep clean, I could:
- Run another cycle with distilled water
- Let it cool again
- Hit only the remaining spots with more baking soda paste
Each cycle would get it a bit cleaner, without ever needing self-clean.
Maintenance Made Simple
My plan going forward is simple: treat this as routine maintenance, not a once-in-a-decade project. Calendar reminders are a great way to make it a habit.
You might aim for:
- Annually for light use
- Twice a year if you cook or bake often
- An extra session before hosting big holidays like Thanksgiving
The more often you use this method, the less scrubbing you will need each time. A single cycle, a quick baking soda touch-up on small spills from the window, then wipe off, and you are done.
It does not need to look like it belongs in a magazine. It just needs to be clean enough that you feel good cooking family dinners in it. The fact that you care about cleaning it at all says a lot.
A Cleaner Oven Without the Stress
The steam clean oven method gives you a cleaner space without the extreme heat, noise, or stress of the self-clean cycle. You use basic tools, a bit of time, and some patience, and you get a space that feels safer and fresher to cook in.
Start with distilled water and a baking dish, let the moisture do its work, then follow up with baking soda paste, scrub lightly, and a vinegar wipe. It will not be perfect, but it will be dramatically better, and it will keep improving each time you repeat the process.
If you are standing in front of a grimy buildup right now, consider this your nudge to start. You are taking care of your home and your people, and that matters. You've got this.


Leave a Reply