
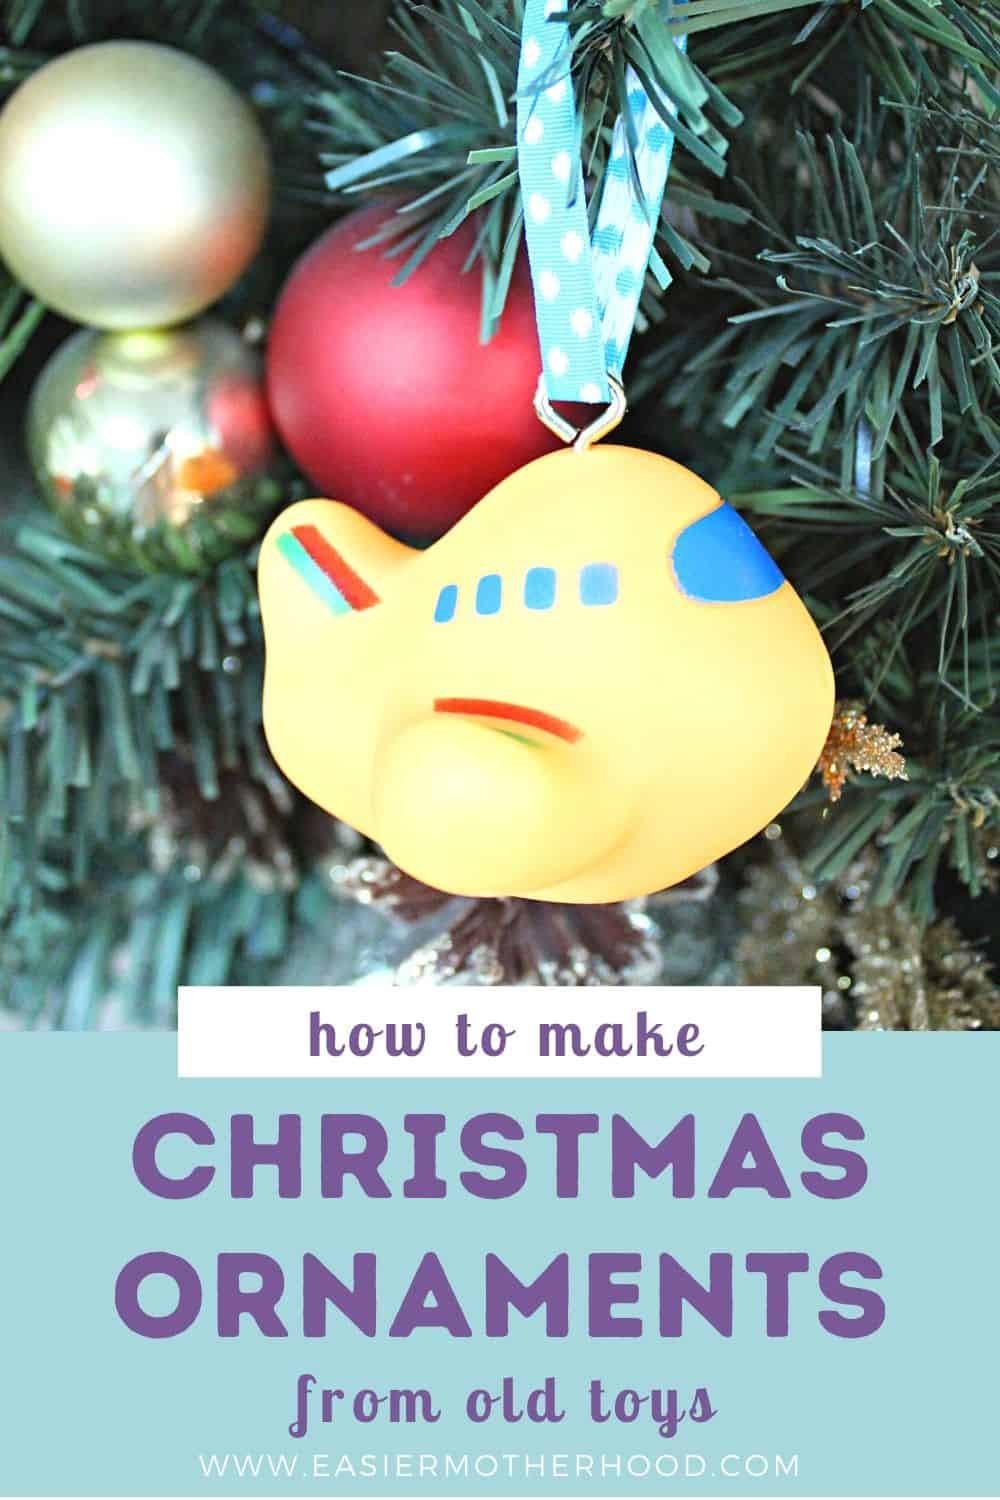
How You Can Make Your Own Custom Christmas Ornaments from Toys
Did you know that you could repurpose old toys into Christmas ornaments?
Well, now you do. And now that you do, let me show you how. It's super simple, I promise.
The basic idea is this: take a lightweight toy (like from a kids' fast food meal), add a little ribbon, and bam! You've made a Christmas ornament.
Why you'll love turning old toys into Christmas ornaments
We all hate clutter. More stuff our kids don’t really use that us moms end up picking up, putting away, relocating, tossing, or donating. But often what we see as clutter as parents, our kids see as treasures.
You know how it goes. As soon as you go to toss an old toy, they suddenly love it SO much and play with it again. Making it into an ornament is a great middle ground. It becomes a small keepsake of their childhood that you both get to enjoy each Christmas season.
This post contains affiliate links, which means I receive a small commission, at no additional cost to you, if you make a purchase using this link.
What kind of old toys to make into Christmas ornaments
To be a good candidate for this craft, a toy needs to be reasonably small and lightweight. You also want the toy to be one you can pierce without a lot of force, hot glue directly onto, or already has a string attached.
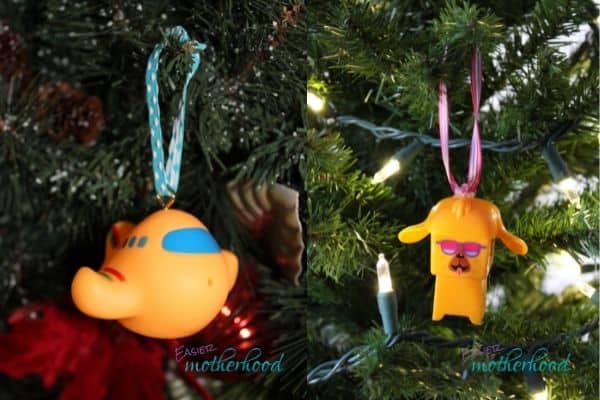
The two I’m showing you here are a kids meal toy and a bath toy. The talented Olivia who inspired this idea on her page We’re The Fischers used toys from her baby’s mobile.
What supplies you’ll need to DIY Christmas Ornaments
With the two different toys, I used two different methods. The supplies are slightly different based on what method you use, so I've separated them below. So you can get an idea of your preference, this photo shows the eye screw ornament on the left, and the hot glue ornament on the right.
The hot glue method is a bit faster and easier in my opinion, however, I prefer the eye screw. This is because I feel it will last longer.
If you're wanting these to be ornaments you can send your kids off with for their own tree in their own home someday, I would most definitely opt for the eye screw method. That said, you can always redo this with the eye screw method if and when the hot glue pops off.
I probably will when the hot glue eventually pops off the block toy ornament. In the meantime though, the hot glue will do fine for it!
Method 1: Eye Screw
For this method you’ll of course need your string or ribbon and toy. You’ll also need an eye screw (I had some extras in a picture hanging kit), and it’s helpful to have a large safety pin or push pin.
Depending on your ribbon material you may also want a lighter. It may also be helpful to have needle nose pliers if your toy material is on the firmer side.
Method 2: Hot Glue
For this method you’ll just need your string or ribbon, toy, and a hot glue gun.
How to make your Upcycled Christmas Ornaments
We’ll take it step by step with each method.
Method 1: Eye Screw
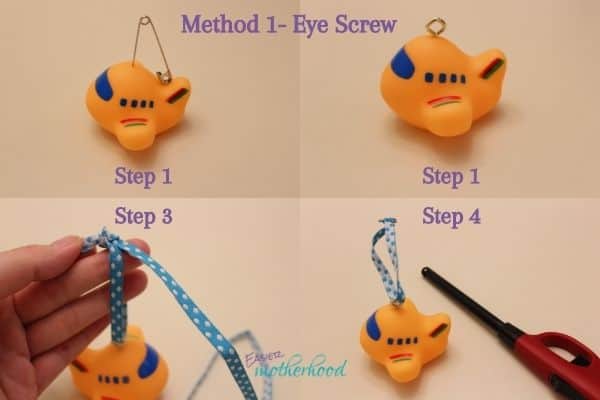
Step 1: Determine where to place your ribbon loop- most likely the middle of the toy’s top. Then use your push pin or safety pin to create a guide hole. This does two things: first, it provides a visual for you when placing the eye screw. Second, it acts as a pilot hole making it a bit easier to pierce the toy with the eye screw.
Note: If you can’t pierce the toy with a push pin or safety pin, it may not be a great candidate for this method. At least not without a bit more power than I tend to put into crafts- I’m sure it could be done with a drill.
Step 2: Insert the eye screw into your guide/pilot hole. Some toys this may be easier to hold the toy and rotate the screw. As you screw in the eye screw keep an eye on the position to make sure it isn’t rotating to the side.
Note: For the bath toy material I used I found it easier to rotate the plane toy. Eitehr way you will need to hold the eye screw firmly. For a bath toy I was able to do this with my hands, for a harder material you may find needle nose pliers helpful.
Step 3: Take your ribbon and run it through the eye screw, then tie a loop at one of the ends. Knot it and once you’re happy with the loop size (my finished loop is about 4” of ribbon), and pull the knot firmly to tighten.
Step 4: Trim the ends of the knot. If the material is one that readily frays, you can use a lighter to briefly melt the ends of the knot. This will keep it from coming apart easily.
Method 2: Hot Glue
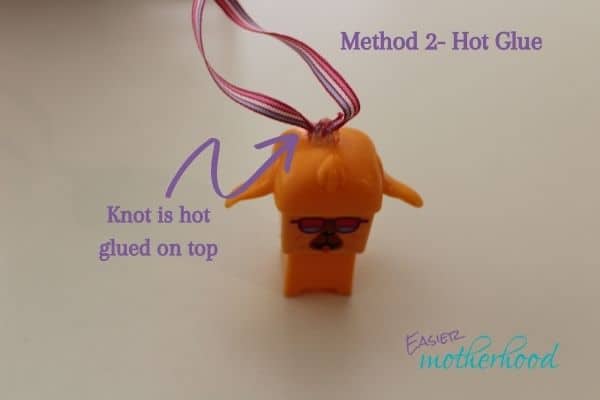
Step 1: Take your ribbon and tie a loop at one of the ends. Knot it and once you’re happy with the loop size, pull the knot firmly to tighten.
Step 2: Trim the ends of the knot. You can use a lighter to melt the ends, but if they’re short enough to be covered with the hot glue feel free to skip the lighter.
Step 3: Place the knot on top of the toy where you want it to hang from.
Step 4: Hot glue the knot in place, gently lifting the loop to make sure the positioning is how you want it. Do not lift so much that the ribbon bears weight before the glue dries. You just want it taut enough so you can tell where it will and position it so it will hang well.
Looking for more holiday fun?
Last year I introduced this concept in my list of Christmas Hacks for Busy Moms- find a few more great ideas there like hanging your wreath from the inside of the door, and using paper clips instead of hooks for your store bought ornaments.


Kari says
I've been toying with the idea of getting my daughter a small tree for her room, and she has so many small toys for chicken nugget meals. This is perfect! And it's such a cute way for kids to help make their own ornaments for their very own tree!
Anne Aslanides says
Oh her own little tree would be so much fun! I absolutely love that <3
Adriane says
This is so cool! Ornaments are one of my favorite things ever. I am always so excited to get the tree out.
Anne Aslanides says
Me too! I love getting the tree and ornaments out- the glow of the lights in the evening and fun ornaments on the tree is one of my favorite things about the season.