
This easy Christmas sensory shaker bottle only takes a few minutes of hands on time and supplies you probably have on hand to create a fun and festive sensory toy!
The holidays creep up on me every year- I think because I refuse to believe it's already almost the end of the year already. It can't be possible our kids are growing this fast, right?
I wanted to make a DIY Shaker bottle anyways since they provide great sensory play without the mess, and both my toddlers are in a phase where they love to shake stuff. Since it's, as Olaf would say, "that time of year", why not make it a festive one?
This post contains affiliate links, which means I receive a small commission, at no additional cost to you, if you make a purchase using this link.
Why You’ll Love This DIY Holiday Shaker Bottle
- It uses basic, easy-to-find supplies
- Older toddlers can help make it (creating something for their sibling is a great way to get into the spirit of the season!)
- Babies and Toddlers alike love the rattle rain sound that rice makes
- Its a reusable, low mess craft.
Supplies you'll need to make your own Christmas Sensory Shaker Bottle
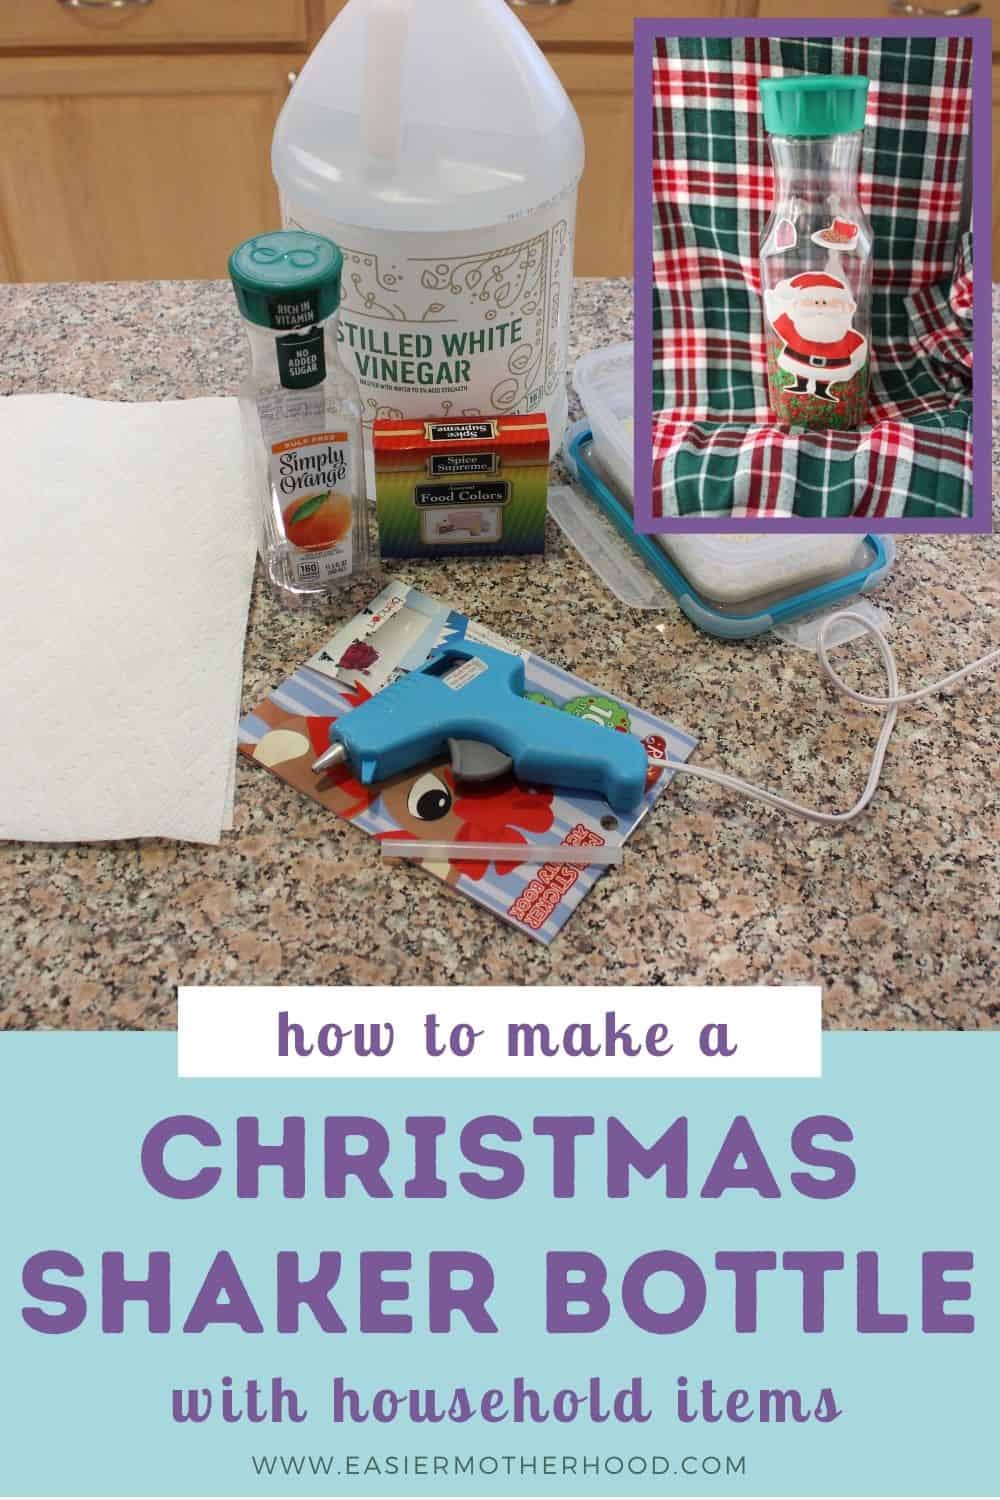
- A clean, see-through bottle. I used a single serve Simply Orange Juice one, which even has a green lid keeping with the festive theme.
- Rice. How much will depend on the size of your bottle, I used ½ cup total- ¼ cup per color.
- Red and Green Food Coloring
- White Vinegar
- 2 paper towels
- A container to mix the rice and food coloring in.
- Hot glue or gorilla glue
- Stickers or ribbon to decorate with
How to make a Christmas Sensory Shaker Bottle
Step 1: Make sure your bottle is clean, free of sticker residue, and dry.
If you use a product like goo gone to get any sticker residue off, make sure to wash it really well afterwards. That stuff works really well, and makes it hard to get your new stickers to stick on. #thingsI'velearned
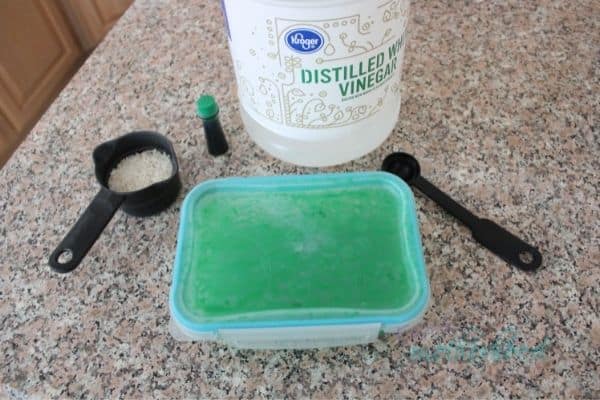
Step 2: Dye Green Rice
Measure half your rice into your mixing container. Add your white vinegar and green food coloring. For ¼ cup rice, I used 1 teaspoon white vinegar and 15-20 drops food coloring. Place the lid on the container and shake vigorously. Once well mixed, spread the dyed rice onto a paper towel. Rinse your container well, and immediately. I used a snapware container and had no issues with staining, but I didn't let the food coloring sit for any length of time, so I can't say it wouldn't have happened if I'd left it there awhile.
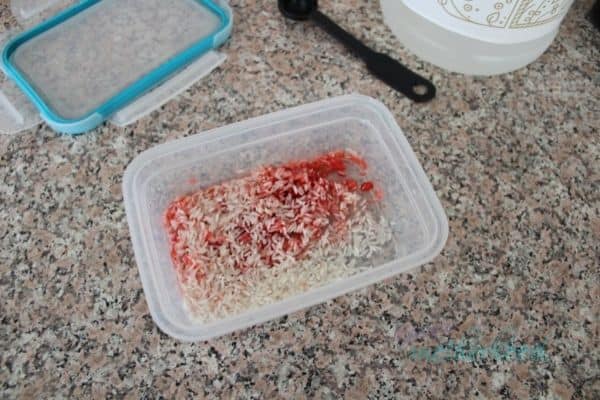
Step 3: Dye Red Rice
Repeat Step 2 but with red. Again, make sure to rinse your container promptly.
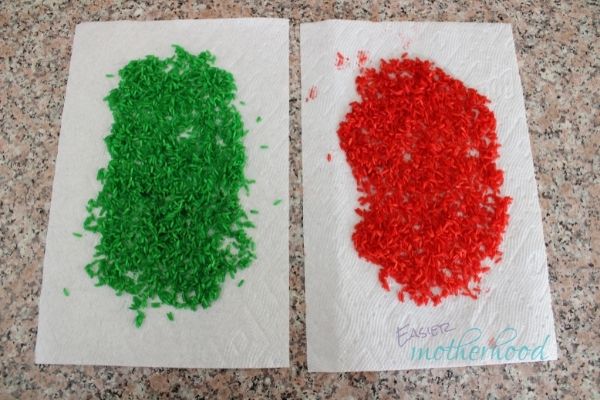
Step 4: Wait for rice to dry completely
This takes about an hour, though I let it go about two. Because, lunch. Speaking of, if you need some lunch ideas I have a whole list for you.
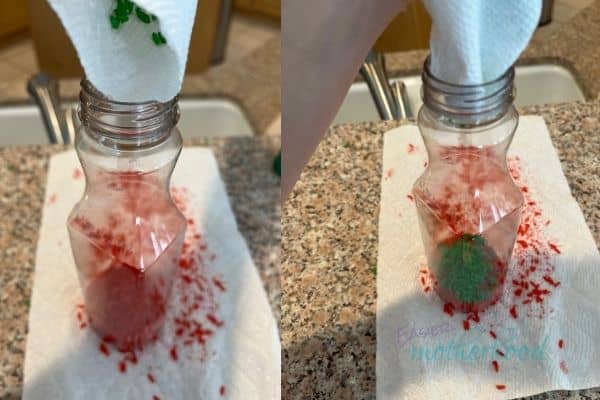
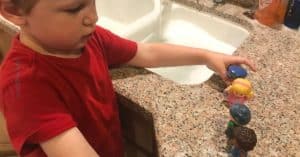
Step 5: Funnel both Christmas colors of rice into your shaker bottle
You can use a funnel if you need to, I rolled the paper towel into it's own makeshift funnel as shown in the photo below.
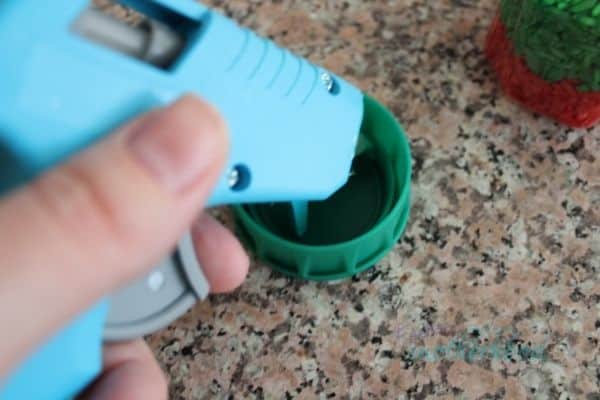
Step 6: Glue the lid of your Christmas Sensory Shaker Bottle closed
Working quickly so the glue doesn't dry, add glue to the rim of the bottle and inside the ridges of the lid. Then screw the lid on tightly. I used a hot glue gun, but super glue or gorilla glue would work too. I also added a bit of glue to the ridges directly on the bottle, but didn't have time to photograph that- I was worried the glue in the lid would dry! Thankfully my shaker bottle lid still feels very secure.
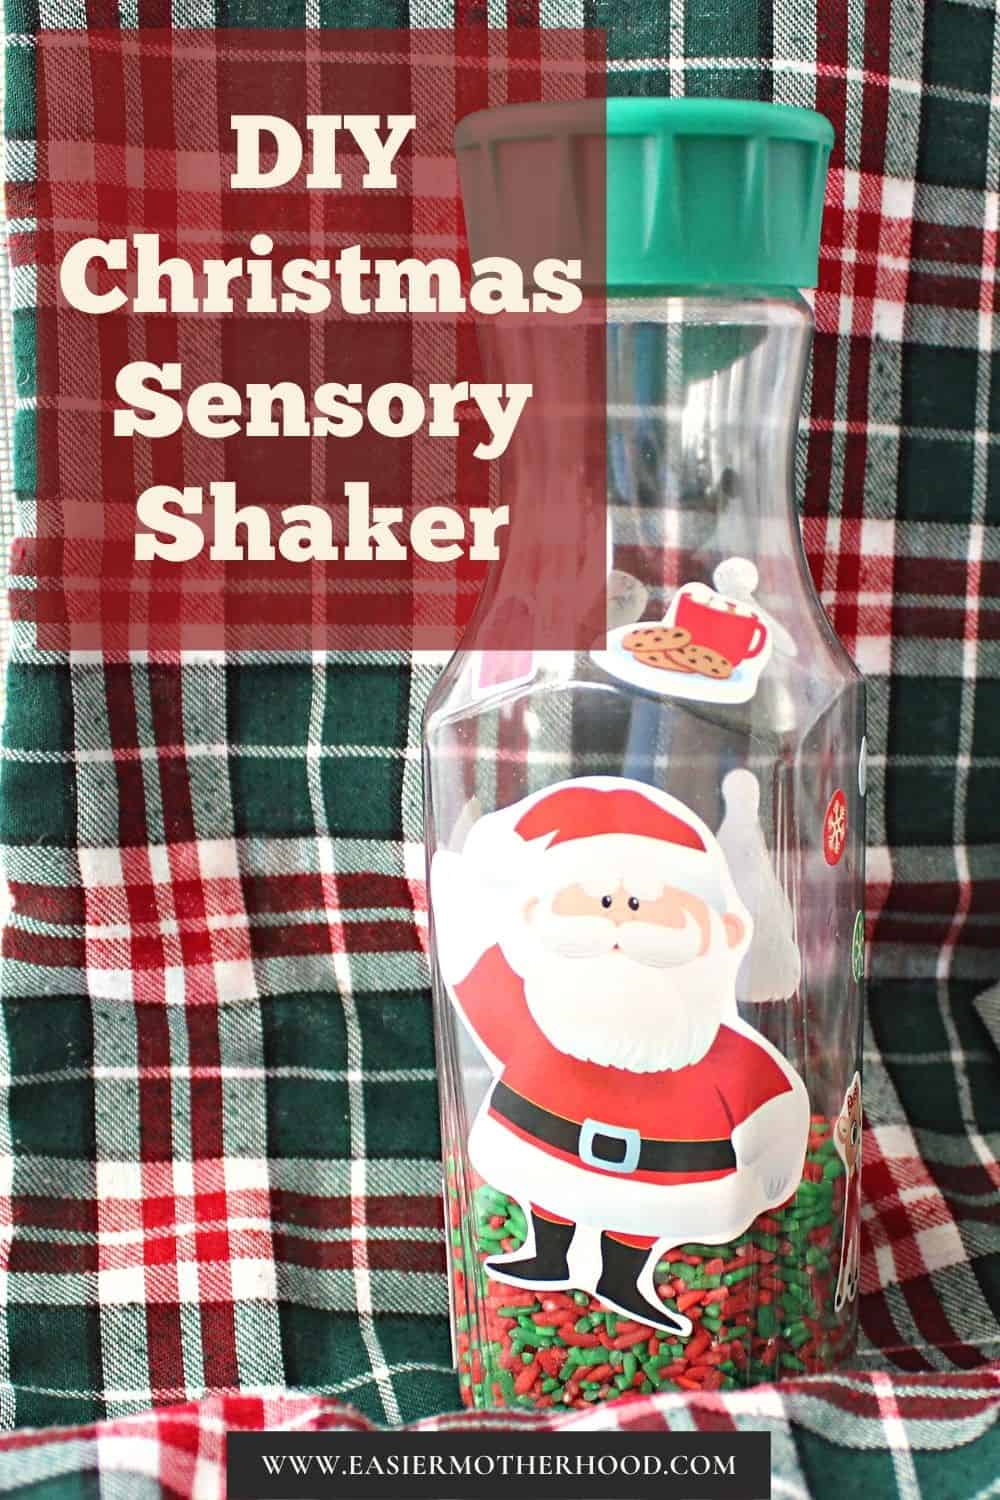
Step 7: Decorate your Holiday Shaker Bottle! And of course, shake!
I didn't have any Christmas ribbon handy or I would have used that. My stickers came from the $1 section of Target last year and weren't the stickiest, so a few days after making this only about half of them were still on the bottle. The good news? Since they weren't super sticky, they were easy to pick up and toss, not scrape off my furniture and walls. If you want to make sure yours stay on you can put a layer of packing tape over your stickers, or use ones that have a stronger adhesive.
What is a DIY Holiday Shaker Bottle?
A Christmas Shaker Bottle is an educational toy that helps children to learn about the five senses. It consists of a bottle with an item or various items inside that they can shake around. A sensory shaker bottle primarily engages with their visual and auditory senses, plus the act of shaking uses their sense of touch as well. Shaking a sensory bottle is also a great activity for connecting cause and effect.
Why are Shaker Sensory Bottles Important for Babies?
Shaker Sensory Bottles are important because they can help babies with their motor skills development. Kids naturally enjoy playing with sensory bottles, and they tend to inspire a sense of wonder and curiosity- traits we want to encourage!
What other sensory activities can I try?
If you're looking for more ways for your child to play while exploring their senses, try these favorites:
Leave a Reply